The user interface
Quark Author Web Edition provides a clean and simple user interface. If you are familiar with desktop word processors you will find that many commands are familiar or self-explanatory.
The figure below shows the main interface of Quark Author Web Edition:
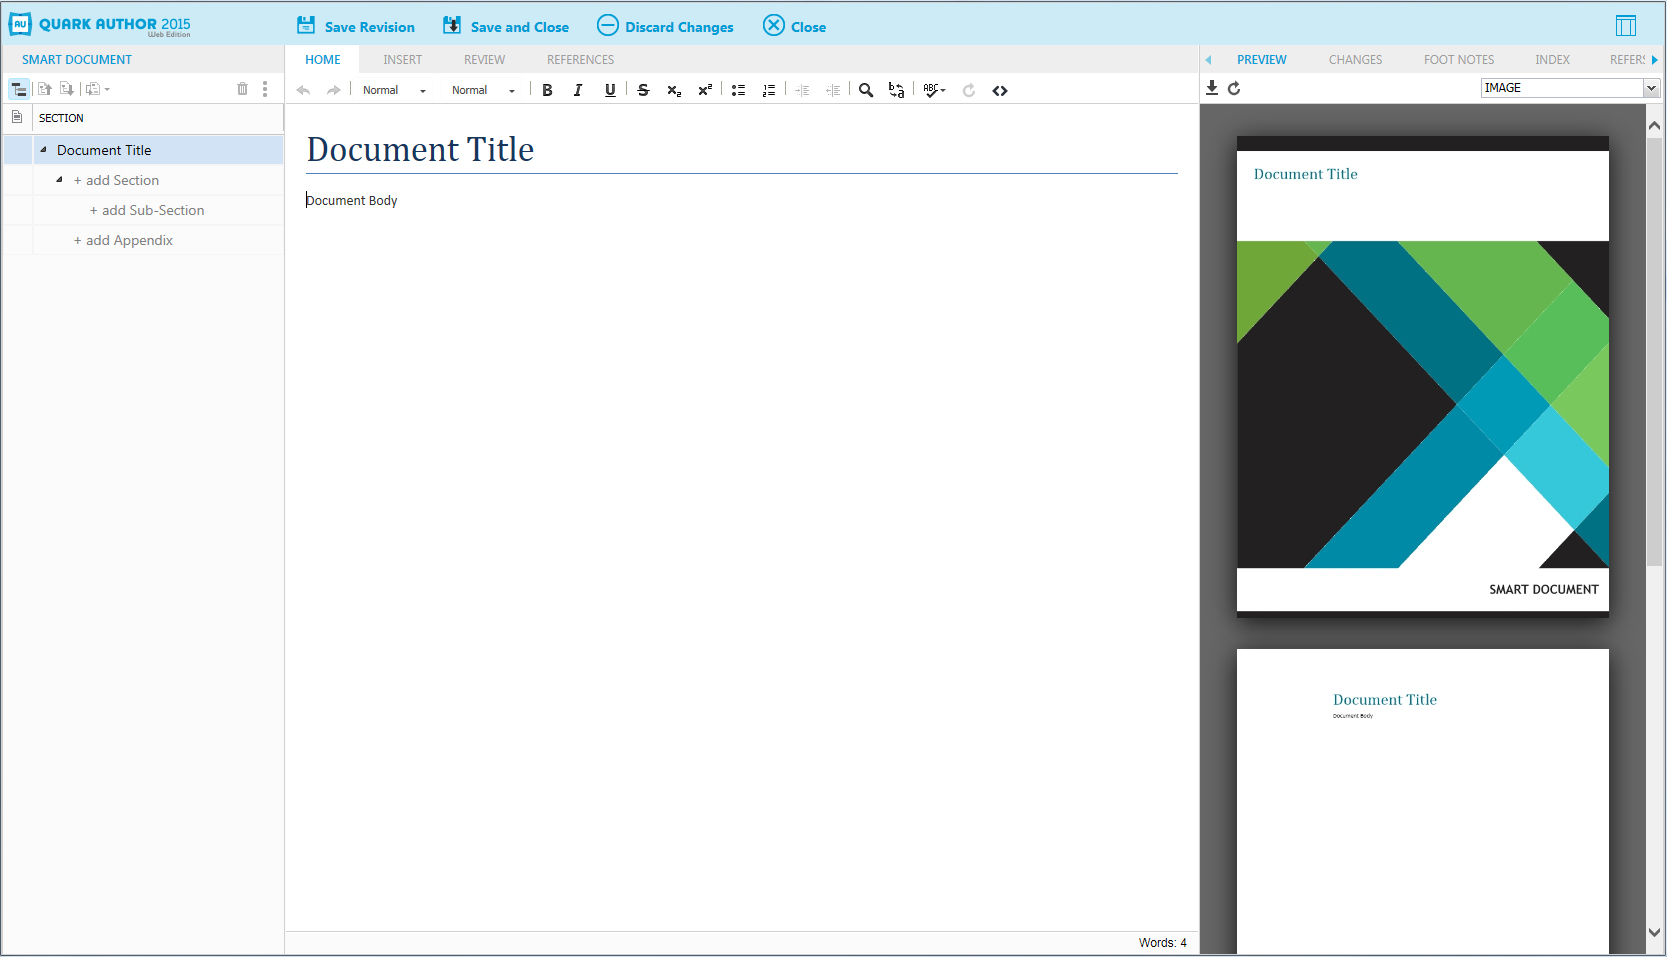
The Quark Author Web Edition user interface consists of the following main parts:
-
The banner at the top of the window provides file-level operations, such as Save and Close. The pane settings button on the far right allows the user to show and hide various task panes.
-
The "Smart Document pane" - the section to the left of the Editing pane containing the tree structure of the document currently being worked on. Use this pane to add and nest sections of the document and to navigate among them.
-
The "Editing pane" - the space below the Toolbar where you edit all document content.
-
The "Right pane" - the section to the right of the Editing pane contains the following tabs:
-
The "Preview tab" - where you can see a live preview of the current document in various output formats.
-
The "Changes tab" - where you can see user comments and tracked changes on the document you are working on.
-
The "Foot Notes tab" - where you can see all footnotes and endnotes contained in the document.
-
The "Properties tab" - where you apply and see all metadata associated with your content.
-
The "Index tab" - where you can insert index terms and see all occurrences of existing index terms contained in the document.
-
The "REFERS TO tab" - where you can see assets that the selected asset refers to.
-
The "WHERE USED tab" - where you can see all documents and components that reference the current component.
-
-
"Context menus" - a shortcut or drop-down menu that displays the commands available for the element that was right-clicked.
-
Various dialog boxes - small pop-up windows that appear when you use some of the editor's functions and are opened by clicking the toolbar buttons.
Smart Document pane
The Smart Document pane is located to the left of the editing pane and presents an outline of the document. The Smart Document pane provides the ability to navigate, insert, delete, promote, demote, convert and move document sections.
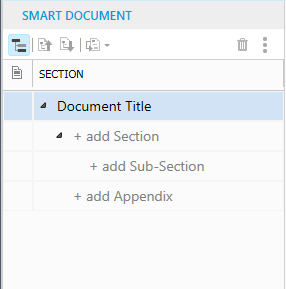
The section under the toolbar is divided into two columns:
-
The first column identifies shared components within the document. An icon in this column identifies the root section of a component, and a check mark indicates the component is checked out for edit. All sections in the component are shaded a different color in the section hierarchy.
-
The second column presents an outline of the sections in the current document. It allows the user to add and delete sections as needed. Additionally, sections can be reordered by dragging and dropping sections within the tree.
Editing pane
The Editing pane is located below the toolbar.
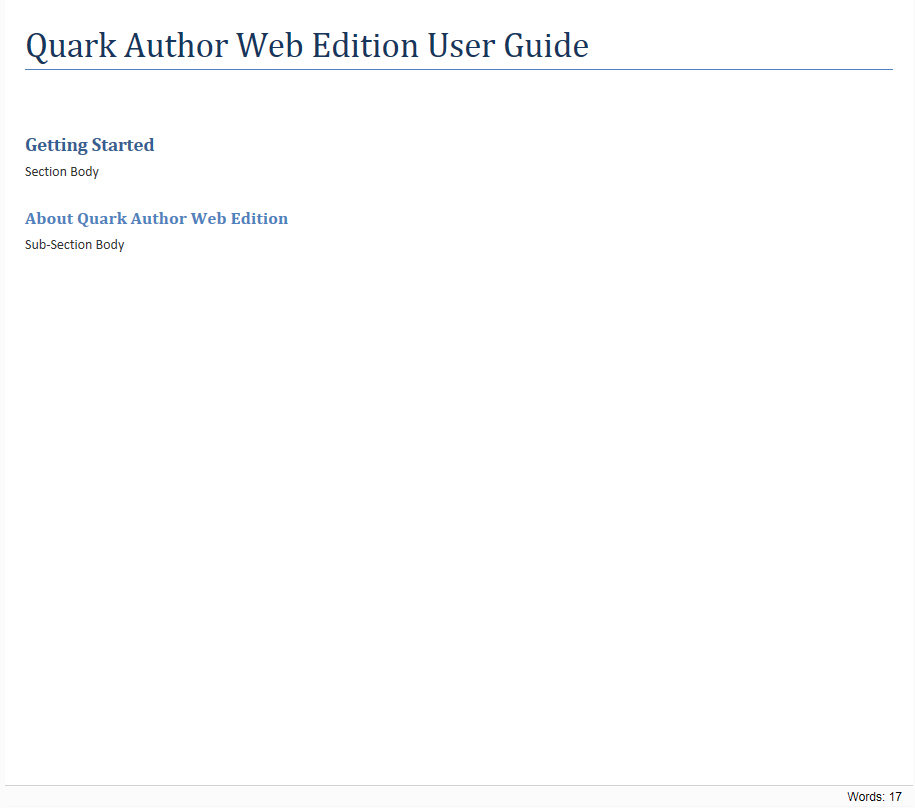
Use the Editing pane to enter the title and contents of each section of your document.
Toolbar
The Toolbar Ribbon is the section located at the top of the Editing pane. It consists of four tabs containing menu buttons that give you access to various functions of Quark Author Web Edition. Buttons include both simple operations (basic "Text emphasis") and more advanced features for providing structure.

The Toolbar Ribbon includes the following tabs:
-
HOME
-
INSERT
-
REVIEW
-
REFERENCES
To see the name of the function associated with a toolbar button, hover the cursor over that button.
There are many other toolbars that can be displayed, hidden or docked with the preview pane. The Toolbar Ribbon groups and tabs are all configurable.
The HOME tab

The HOME tab includes the following controls:
-
 ,
,  - Use the Redo and Undo toolbar buttons to redo and undo the most recent action performed on the document.
-
Use the Para Types toolbar button to select from the drop-down menu to apply a paragraph style to the selected text.
-
Use the Tag Types toolbar button to select from the drop-down menu to apply a character style to the selected text.
-
 ,
,  ,
,  ,
,  - Use to apply bold, italic, underline and strike-through emphasis to the selected text.
-
 ,
,  - Use to apply superscript and subscript emphasis to the selected text.
-
 ,
,  ,
,  ,
,  - Use to apply list options (bulleted list, numbered list, increase indent, decrease
indent) to the selected text.
- Use to apply list options (bulleted list, numbered list, increase indent, decrease
indent) to the selected text.
-
 ,
,  - Use the Find and Replace toolbar buttons to search for a word or phrase in the document and replace it.
-
-
 - Use the Refresh toolbar button to refresh the contents of referred components in the document.
-
 - Use the XML toolbar button to view the document in XML format.
The INSERT tab

The INSERT tab includes the following controls:
-
 - Use the Insert Table toolbar button to insert a table with the defined number of columns and rows into
the document. See "Inserting tables".
- Use the Insert Table toolbar button to insert a table with the defined number of columns and rows into
the document. See "Inserting tables".
-
 - Use the Insert Table from Server toolbar button to insert a smart table into the document. See "Inserting tables from server".
-
 - Use the Insert Region toolbar button to insert a region into the document. See "Creating a region".
-
 - Use the Insert Region from Server toolbar button to insert a saved region into the document. See "Creating a region".
-
 - Use the Insert Figure toolbar button to insert a figure into the document. See "Inserting a figure".
-
 - Use the Insert Image toolbar button to insert an image into the document. See "Inserting an image".
-
 - Use the Insert Video toolbar button to insert a video into the document. See "Inserting videos".
-
 - Use the Insert Excel Components toolbar button to insert components from an Excel spreadsheet. The drop-down menu
allows you to choose to insert a Table or a Chart.
- Use the Insert Excel Components toolbar button to insert components from an Excel spreadsheet. The drop-down menu
allows you to choose to insert a Table or a Chart.
-
 - Use the Insert PowerPoint toolbar button to insert a PowerPoint slide into the document. See "Inserting PowerPoint slides".
-
 - Use the Insert Visio toolbar button to insert a Visio page into the document. See "Inserting Visio pages".
-
 - Use the Paste from Server toolbar button to insert the data currently saved on the server clipboard into the
document.
- Use the Paste from Server toolbar button to insert the data currently saved on the server clipboard into the
document.
-
 - Use the Insert Special Character toolbar button to insert special characters or symbols into the document.
-
 - Use the Math editor toolbar button to insert an equation into the document. See "Equation editing".
This feature is disabled in the default configuration. Configuration changes are required to enable this plugin. See the Quark Author Web Edition System Administration Guide for details on enabling this plugin.
- Use the Math editor toolbar button to insert an equation into the document. See "Equation editing".
This feature is disabled in the default configuration. Configuration changes are required to enable this plugin. See the Quark Author Web Edition System Administration Guide for details on enabling this plugin.
The REVIEW tab

The REVIEW tab includes the following controls:
-
 - Use the Add Comment toolbar button to add a comment to the document.
-
 - Use the Remove Comment toolbar button to remove a comment from the document.
-
 - Use the Hide All Comments toolbar button to hide all comments in the document. These comments will still appear
in the CHANGES tab in the Right pane.
- Use the Hide All Comments toolbar button to hide all comments in the document. These comments will still appear
in the CHANGES tab in the Right pane.
-
 - Use the Show Previous Comment toolbar button to go to the previous comment in the document.
-
 - Use the Show Next Comment toolbar button to go to the next comment in the document.
-
 - Use the Tracking toolbar button to enable/disable tracked changes. If you enable/disable tracking
in your document, the tracking state will be saved in the
- Use the Tracking toolbar button to enable/disable tracked changes. If you enable/disable tracking
in your document, the tracking state will be saved in the Tracking Stateattribute when you save the document. -
 - Use the Highlighting toolbar button to enable/disable highlighting of tracked changes. If you enable/disable
highlighting in your document, the highlighting state will be saved in the
- Use the Highlighting toolbar button to enable/disable highlighting of tracked changes. If you enable/disable
highlighting in your document, the highlighting state will be saved in the Tracking Stateattribute when you save the document. -
 - Use the Next button to go to the next tracked change in the document.
-
 - Use the Previous toolbar button to go to the previous tracked change in the document.
-
 - Use the Accept toolbar button to accept the current change, accept the current change and automatically
move to the next, or to accept all changes in the document.
- Use the Accept toolbar button to accept the current change, accept the current change and automatically
move to the next, or to accept all changes in the document.
-
 - Use the Reject toolbar button to reject the current change, reject the current change and move to
the next, or to reject all changes in the document.
- Use the Reject toolbar button to reject the current change, reject the current change and move to
the next, or to reject all changes in the document.
-
 - Use the Spelling and Grammar toolbar button drop-down menu to select options for proofing your document.

The REFERENCES tab

The REFERENCES tab includes the following controls:
-
 - Use the Link toolbar button to insert a hyperlink into the document.
-
 - Use the Insert Cross Reference toolbar button to insert a cross reference, pointing to any other Section, Figure
or Table inside the document.
- Use the Insert Cross Reference toolbar button to insert a cross reference, pointing to any other Section, Figure
or Table inside the document.
-
 - Use the Synchronize Cross Reference toolbar button to synchronize the cross references in the document.
The Insert Cross Reference and the Synchronize Cross Reference buttons are only available after you have saved a revision of the document.
-
 - Use the Insert Footnote toolbar button to insert a footnote into the document.
-
 - Use the Insert Endnote toolbar button to insert an endnote into the document.
-
 - Use the Create Table Component toolbar button to create a component from the selected table.
-
- Use the Replace Table from Server toolbar button to replace the selected table with a table component saved on the
server.
-
 - Use the Create Region Component toolbar button to create a component from the selected region.
-
 - Use the Replace Region from Server toolbar button to replace the selected region with a region component saved on the
server.
- Use the Replace Region from Server toolbar button to replace the selected region with a region component saved on the
server.
-
 - Use the Edit Component toolbar button to edit the selected component.
-
 - Use the Save Component toolbar button to save the selected component.
-
 - Use the Save & Close Component toolbar button to save and close the selected component.
-
 - Use the Discard Changes toolbar button to discard any changes made to the selected component.
-
- Use the Refresh toolbar button to refresh the contents of referred components in the document.
-
 - Use the Remove Component Reference toolbar button to remove the selected component reference.
-
 - Use the Pin Component Reference toolbar button to pin the selected component reference.
-
 - Use the Unpin Component Reference toolbar button to unpin the selected component reference.
Dynamic tabs
Quark Author Web Edition allows you to configure context based dynamic tabs in the Toolbar ribbon. Buttons relevant to the current context are shown under these dynamic tabs. See the "Dynamic toolbar tabs" section of the Quark Author Web Edition System Admin Guide for details on how to configure your own custom dynamic tabs.
The default configuration of Quark Author Web Edition includes two dynamic tabs:
The TABLE tab
The TABLE tab appears on the Toolbar ribbon when your cursor is placed inside a table.

The Table tab includes the following controls:
-
Use the Table Types drop-down list to convert a table to a different type.
-
 - Use the Caption toolbar button to add a caption to the table.
-
 - Use the Description toolbar button to add a description to the table.
-
 - Use the Insert Paragraph After toolbar button to insert a paragraph after the table.
-
 - Use the Insert Row Above toolbar button to insert a row above the selected row.
-
 - Use the Insert Row Below toolbar button to insert a row below the selected row.
-
 - Use the Insert Column to the Left toolbar button to insert a column to the left of the selected column.
-
 - Use the Insert Column to the Right toolbar button to insert a column to the right of the selected column.
-
 - Use the Split Cell Horizontally toolbar button to split the selected cell horizontally.
-
 - Use the Split Cell Vertically toolbar button to split the selected cell vertically.
-
 - Use the Merge Cells toolbar button to merge multiple, selected cells into one cell.
-
 - Use the Delete Rows toolbar button to delete the selected rows.
-
 - Use the Delete Columns toolbar button to delete the selected columns.
-
 - Use the Delete Table toolbar button to delete the entire table.
The REGION tab
The REGION tab appears on the Toolbar ribbon when your cursor is placed inside a region.

The Region tab includes the following controls:
-
Use the Region Types drop-down list to convert a region to a different type.
-
 - Use the Region Title toolbar button to add a title to the region.
-
 - Use the Insert Paragraph After toolbar button to insert a paragraph after the region. This is useful when you wish
to add content outside the current region.
- Use the Insert Paragraph After toolbar button to insert a paragraph after the region. This is useful when you wish
to add content outside the current region.
-
 - Use the Remove Region toolbar button to remove the region. Removing a region does not delete the content.
Right pane
The screen area to the right of the Editing pane contains the following tabs:
-
The "Preview tab" - where you can see a live preview of the current document in various output formats.
-
The "Changes tab" - where you can see user comments and tracked changes on the document you are working on.
-
The "Foot Notes tab" - where you can see all the footnotes and endnotes contained in the document.
-
The "Properties tab" - where you apply and see all the metadata associated with your content.
-
The "Index tab" - where you can see a list of all index terms and their associated occurrences. Use this tab to insert new index terms and add new occurrences to existing index terms.
-
The "REFERS TO tab" - where you can see assets that the selected asset refers to.
-
The "WHERE USED tab" - where you can see all documents and components that reference the current component.
Use the Pane Settings button in the upper, far right corner to hide/display the various tabs.
Preview tab
The PREVIEW tab allows you to preview the current document in multiple output formats like PDF, HTML5 Publication, and Responsive HTML5. This is where you preview the appearance of the final document.
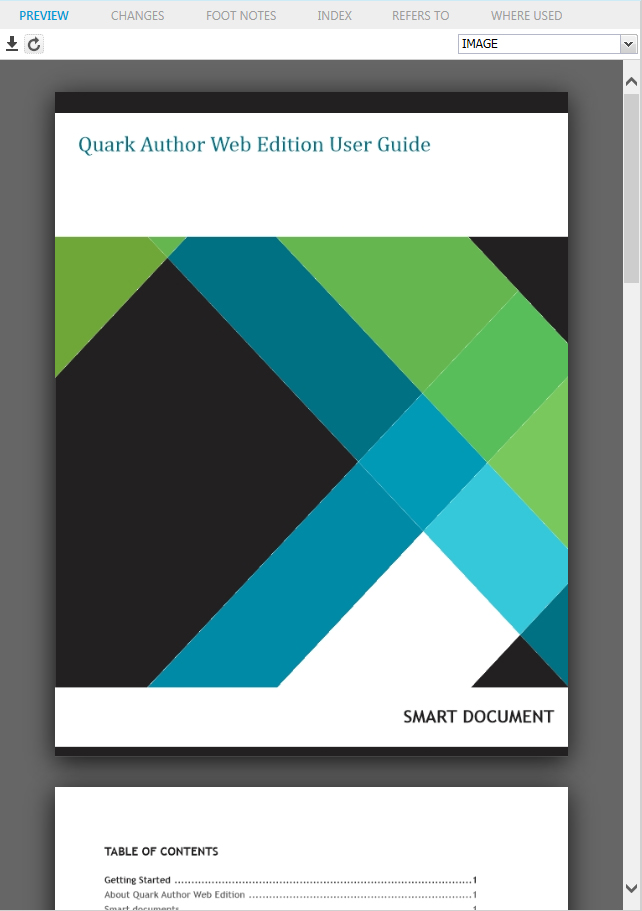
The PREVIEW tab toolbar includes the following controls:
-
 - Use the Download toolbar button to save a copy of the document.
-
- Use the Refresh toolbar button to refresh the preview document with the latest content in the Editing pane.
-
Use the drop-down list to select the preview format.
Changes tab
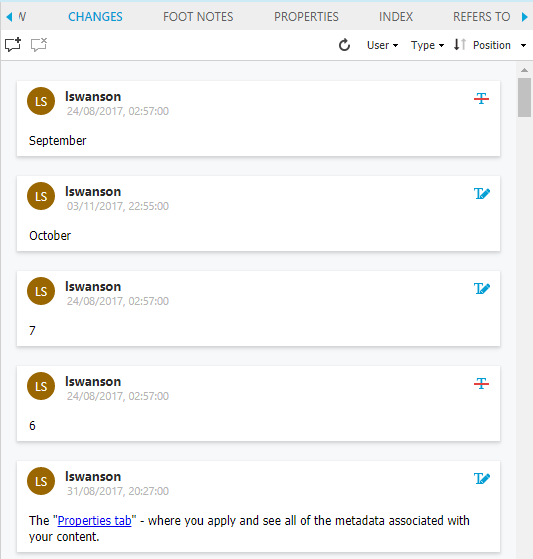
The CHANGES tab allows you to see a list of all comments and tracked changes that have been added to the current document.
The CHANGES tab toolbar includes the following controls:
-
 - Use the Add Comment toolbar button to insert a comment in the document.
-
 - Use the Delete Comment toolbar button to delete the currently selected comment.
-
- Use the Refresh toolbar button to see recent comments or tracked changes.
-
 - Use the User toolbar button to filter by specific users. Filtering by user impacts what comments
are visible in both the CHANGES tab and on the editing canvas.
- Use the User toolbar button to filter by specific users. Filtering by user impacts what comments
are visible in both the CHANGES tab and on the editing canvas.
-
 - Use the Type toolbar button to filter by type (comments, insertions, deletions). Filtering comments
by type only impacts the CHANGES tab and does not impact what comments are visible
on the editing canvas.
- Use the Type toolbar button to filter by type (comments, insertions, deletions). Filtering comments
by type only impacts the CHANGES tab and does not impact what comments are visible
on the editing canvas.
-
 - Use the Position toolbar button to sort the list by position in the authoring canvas in ascending
or descending order. When the list is sorted by position, the items in the CHANGES tab auto-scroll to match the cursor position in the editing canvas.
- Use the Position toolbar button to sort the list by position in the authoring canvas in ascending
or descending order. When the list is sorted by position, the items in the CHANGES tab auto-scroll to match the cursor position in the editing canvas.
-
 - Use the Date toolbar button to sort the list by Date in ascending or descending order. When the list is sorted by date, the items in the
CHANGES tab do not auto-scroll to match the cursor position in the editing canvas.
- Use the Date toolbar button to sort the list by Date in ascending or descending order. When the list is sorted by date, the items in the
CHANGES tab do not auto-scroll to match the cursor position in the editing canvas.
 to accept or reject the proposed change from the CHANGES tab.
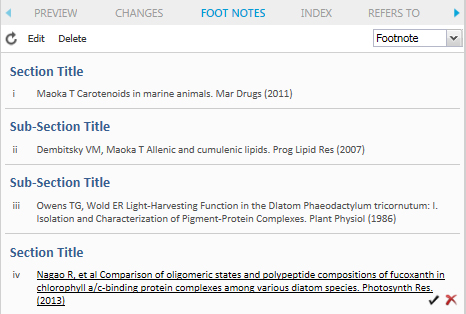
Foot Notes tab
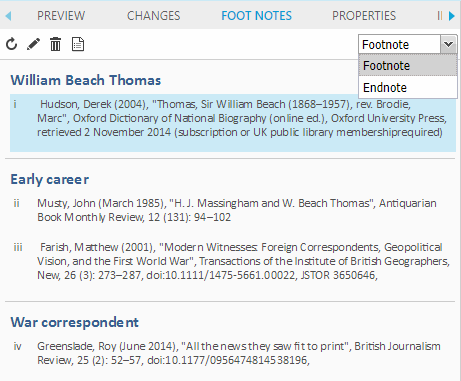
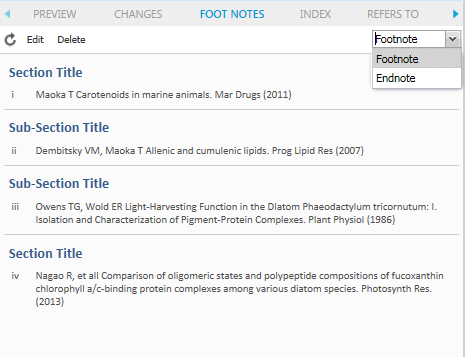
The FOOT NOTES tab displays all the footnotes and endnotes contained in the document.
The FOOT NOTES tab toolbar includes the following controls:
-
- Use the Refresh toolbar button to refresh the list to include any recent footnotes or endnotes.
-
 - Use the Edit toolbar button to edit the selected footnote or endnote.
-
 - Use the Delete toolbar button to delete the selected footnote or endnote.
-
 - Use the Edit Properties toolbar button to edit the metadata of the selected footnote or endnote.
-
Use the drop-down menu to filter the list by type (footnotes or endnotes).
If you click on a footnote or endnote from the list, the footnote or endnote location in the document will be highlighted. When you select a footnote or endnote on the editing canvas, this footnote or endnote is selected on the FOOT NOTES tab.
If you insert a footnote or endnote when tracking is on, then the footnote/endnote in the list has additional options.

You can use these options to Accept or Reject the inserted footnote/endnote.
Index tab
The INDEX tab provides features for producing a generated index of terms. This tab displays a list of all index terms and their associated occurrences. Use this tab to insert new index terms and add new occurrences to existing index terms.
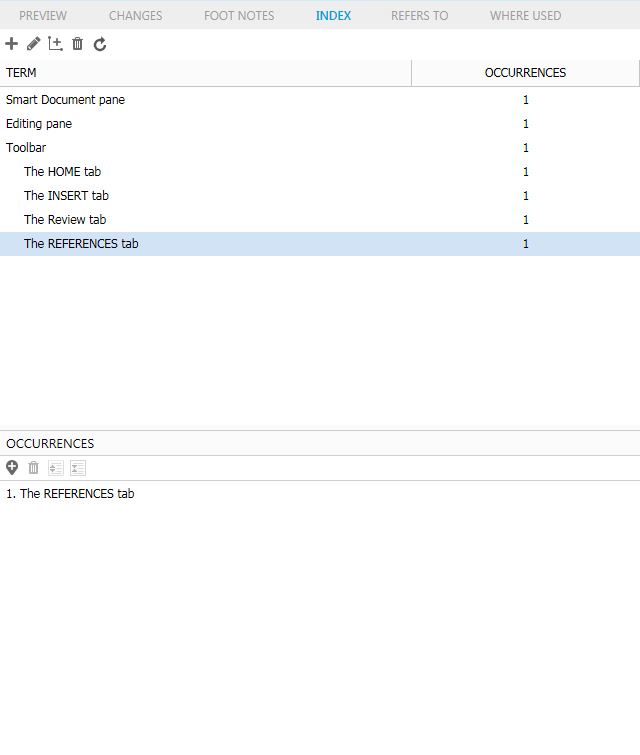
The upper section of the INDEX tab lists the index terms in the document.
The Occurrences section of the INDEX tab lists all occurrences of the selected index term.
See "Indexes" for more information about using this tab to manage indexes.
The Refers To and Where Used tabs
The REFERS TO and WHERE USED tabs allow you to view the relationships (including primary and secondary references, if any) for the selected asset. The current document Refers To assets (images and components). These are primary, or first-level references. These referred to assets may Refer To other assets. These are secondary, or second-level references.
REFERS TO tab
The REFERS TO tab displays all assets that the selected asset refers to.
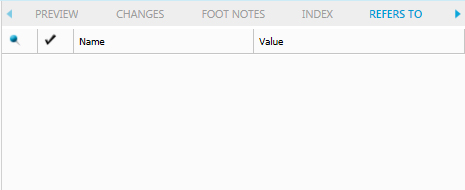
The REFERS TO tab includes the following columns:
-
 - The Pinned Version column is used to indicate if a referenced asset is pinned to a specific version
of that asset. The tooltip will show the version that the reference is pinned to.
- The Pinned Version column is used to indicate if a referenced asset is pinned to a specific version
of that asset. The tooltip will show the version that the reference is pinned to.
-
 - The Checked Out column is used to indicate if the referenced asset is currently checked out.
-
The Name column gives the name of the referenced asset.
When you double-click an asset in this tab, an XPath is displayed below the asset name. The Value column contains the XPath location within the current document where the asset is referenced.
WHERE USED tab
The WHERE USED tab allows you to see all documents and components that reference the current component.
This tab is only applicable when opening a content type that can be included within another content type. With our default configuration, when opening a Smart Section, the WHERE USED tab lists all Smart Documents that include the section.
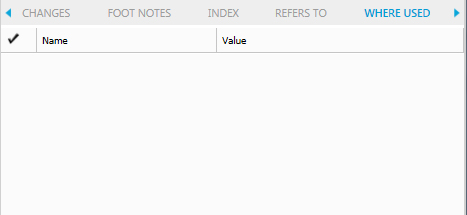
The WHERE USED tab includes the following columns:
-
- The Checked Out column is used to indicate if the parent asset is currently checked out.
-
The Name column gives the name of the parent asset.
-
The Value column contains the XPath location within the parent document where the current component is referenced.
Context menus
Context menus are pop-up menus that appear whenever you right-click anywhere in the application. It serves as a shortcut for most common operations available for a given type of object.
The menu is context-sensitive which means that the options displayed in it depend on the object that you click. If, for example, you right-click while inside a table, you will see table-specific options available in its context menu.
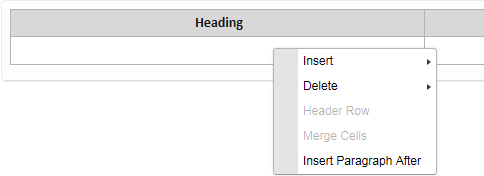
For more complex objects, like tables, the context menu might include sub-menus with further options.