Content editing
Text emphasis
Text emphasis determines the way your text will look in the published document.
The text styling features are grouped together on the HOME tab.

The bold, italics, underline and strike-through styles can be applied to the whole document, a paragraph, a word or phrase, or a single letter. The underline and strike-through styles will also be applied to all white space of the selected fragment.
Using styles to format text
Formats and styles are predefined combinations of various formatting options that make it easier to keep the presentation of the text uniform.
Character styles
A character style is a collection of character formatting attributes that can be applied to text in a single step. By default, text that you type into a document will have the Normal character style applied to it.
To choose a character style, select a text fragment and click the Tag Types toolbar button on the HOME tab. The drop-down list contains several predefined character styles that you can apply to the selected text. To make the choice easier, the style names are displayed in the style that they represent, giving you a preview of what the text will look like:
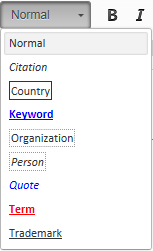
A character style can be applied to the whole document, a paragraph, a word or phrase, or a single letter.
Paragraph styles
A paragraph style includes both character and paragraph formatting attributes, and can be applied to a paragraph or range of paragraphs.
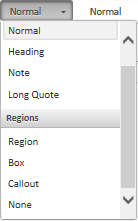
Quark Author Web Edition includes four predefined paragraph styles: Normal, Heading, Note, and Long Quote. By default, Quark Author Web Edition automatically applies the Normal paragraph style to all text in a new document.

To apply a paragraph style, select the paragraph(s) that you want to format, click the Para Types toolbar button on the HOME tab and then choose the paragraph style you want. The drop-down list contains the predefined paragraph styles that you can apply to the selected text:
To select a single paragraph for applying a paragraph style, you can click anywhere in the paragraph. To select more than one paragraph, click anywhere in the first paragraph and drag to anywhere in the last paragraph that you want to select. You do not need to select the entire paragraph.
When you apply a paragraph style, character styles that you have applied to any text in the paragraph remain intact.
The paragraph style will default back to the Normal style when a new paragraph is started.
Change a paragraph style to a different paragraph style (i.e. from Heading to Note) by selecting the paragraph and then choosing the new paragraph style.
Removing styles
Remove a style applied with the Para Types or Tag Types menus by opening the drop-down list and clicking the formatting style name again.
Regions
A region is a meaningful wrapper element that can be applied to a contiguous run of one or more block elements. This allows a user to perform the usual edits within the semantically wrapped content including:
-
adding new content.
-
deleting content.
-
merging content into the region.
-
separating content into multiple regions.
-
nesting content within a region.
You select and apply a region similarly to the way you apply a paragraph style, but it behaves differently from other paragraph styles in several ways.
Creating a region
To create a region, place the cursor in a paragraph, click the Para Types toolbar button on the HOME tab and then choose the desired region type (Quark Author Web Edition includes three predefined region types: Region, Box and Callout).
A region is created and the current paragraph is nested inside that region.
When creating a region, the behavior varies slightly based on the location of the cursor or your selection.
-
If inside a table cell:
The region is created within the cell and selected content is included in the region. Each selected table cell is a separate region of the same type.
-
If inside a figure or video:
A region cannot be the child of a figure or video, so if the cursor is in a figure or video, the entire figure or video is added to the new region. When a selection partially or completely includes a figure or video, the figure or video will be included in the new region.
-
If inside a list item:
When the cursor is in a list item, the complete list is wrapped in the new region. If the list item is part of a set of contiguous non-numbered paragraphs, a table, or a figure, then the new region will be nested in the list item.
To select a single paragraph for creating a region, click anywhere in the paragraph. To select more than one paragraph, click anywhere in the first paragraph and drag to anywhere in the last paragraph that you want to select. You do not need to select the entire paragraph.
Working with regions
A region can contain other components besides text such as figures, images, lists and tables. A region can also be applied to cells within a table.
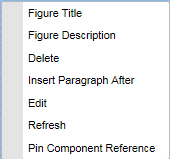
Exiting a region
If the cursor is within one of the region styles (Region, Box or Callout) and a new paragraph is started, the paragraph will be created inside the same region with the Normal paragraph style applied to it. There are three ways to exit a region and begin a new Normal paragraph outside of the region:
-
Place your cursor within the region and Ctrl-Enter.
-
Place your cursor within the region and click the Insert Paragraph After
 icon on the dynamic REGION tab.
 -
Right-click within the region and choose Insert Paragraph After from the context menu.
Paragraph styles within regions
If you select a paragraph within a region, and attempt to apply a paragraph style to it, the style will be applied to the paragraph, with no effect on the remaining paragraphs in the region. For example, if you select (or click in) a paragraph within a Box region and then apply the Heading style, the paragraph is formatted with the Heading paragraph characteristics, but the paragraph will still be contained within the Box region.

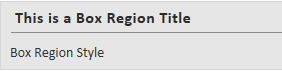
Region titles
You can add a title to an entire region. To add a title to a region, right-click within
the region and choose Region Title from the context menu, or place the cursor within the region and click the Region Title  icon on the dynamic REGION tab.
Copying and pasting regions
To copy and paste an entire region and preserve the region style, select the entire contents of the region. When a partial selection is copied and pasted, the region style is lost.
Nesting regions
Regions can be nested, i.e. a Box region within a Callout region, as shown here:
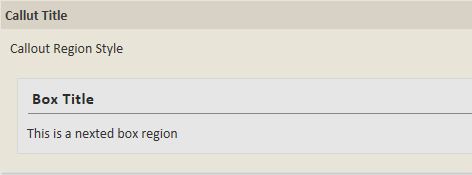
To nest a region within a region, you must first create the content. Next, select the paragraph or paragraphs you want in the nested region and then choose the new region style.
To change an entire region from one style to another, place the cursor inside the existing region and then select the new region style.
Cross reference to a region
You can insert a cross references to a region in a document, see "Inserting a cross reference".
If a region contains a title, the title will be used to create the cross reference. If a region does not contain a title, the cross reference will be created using the first 32 characters of the first paragraph present in that region.
Removing a region
There are three ways to remove a region:
-
Place the cursor within the region and choose None from the Para Types drop-down menu.
-
Place the cursor within the region and click the Remove Region
 icon on the dynamic REGION tab.
-
Right-click within the region and choose Remove Region from the context menu.
The region will be removed but any character or paragraph styles that you have applied to text and paragraphs within the region will remain intact. The region title will remain, but will revert to a Normal paragraph style.
Rich text
Lists
Lists provide a way to structure text in a clear manner, as well as group items that belong together. Quark Author Web Edition lets you create two types of lists:
-
Bulleted (unordered)
-
Numbered (ordered)
Inserting a list
To create a list, click the  Insert/Remove Bulleted List or the
  Insert/Remove Numbered List toolbar button on the HOME tab. A default list marker will appear at the beginning of the line of text that
contains the cursor and the line will become indented.
Insert/Remove Numbered List toolbar button on the HOME tab. A default list marker will appear at the beginning of the line of text that
contains the cursor and the line will become indented.
If you want to add further list items, press Enter on your keyboard. The cursor will move to the next line with a list marker placed at its beginning. The list is continued automatically as long as you press Enter at the end of a line. If you want to suppress list creation, press Enter in an empty line with a list marker.
To convert part of a bulleted list to a numbered list and vice versa, select the desired
list items and click the Insert/Remove Bulleted List or the Insert/Remove Numbered List button on the HOME tab.
To convert a complete bulleted list to a numbered list or vice versa, place the cursor
in the first paragraph of any list item and click the Insert/Remove Bulleted List or the Insert/Remove Numbered List toolbar button on the HOME tab.
Multiple content block lists
A multiple content block list item is a list item containing one or more content blocks, such as paragraphs, sub-lists, tables or figures, in addition to the initial paragraph of text. There are two ways to add multiple content blocks to a list item:
-
Place the cursor at the beginning of the list item following the list item you want to add multiple content blocks to and press the Backspace key.
That list item will become the next paragraph in the preceding list item.
-
Place the cursor in the list item following the list item you want to add multiple content blocks to and click the Insert/Remove Bulleted List or the Insert/Remove Numbered List toolbar button on the HOME tab.
If you hit Enter at the end of a multiple content block list item, a new paragraph will be added to the same list item.
To change a paragraph of a multiple content block list item into a separate list item,
place the cursor within the paragraph and click the Insert/Remove Bulleted List or the Insert/Remove Numbered List toolbar button on the HOME tab again.
You can insert videos, tables, Microsoft Excel components, figures, images and cross references into list items.
Converting existing text to a list
To turn existing text into a list, select one or more paragraphs and click the Insert/Remove Bulleted List or the Insert/Remove Numbered List toolbar button on the HOME tab. Each paragraph will then become a separate list item.
Converting a list to text
To remove list formatting, leaving the text of the list items intact, select the list
in the document and click the Insert/Remove Bulleted List or the Insert/Remove Numbered List toolbar button on the HOME tab. The list markers and indentation will be removed and each of the former list
items will become a paragraph.
Nesting lists
Sometimes one list level is not enough to represent a more complicated structure of items. Quark Author Web Edition lets you add multiple levels of nesting to your bulleted and numbered lists.
You can also combine bulleted and numbered lists of various indentation levels.
Increasing indent
To create a nested bulleted or numbered list, use the Increase Indent feature. Place the cursor in the line that should start the nested list and click
the  Increase Indent toolbar button on the HOME tab. The list item will become indented and the list marker will change. The next
item added to the list will have the same indentation as the previous one and thus
become a part of the nested list.
Increase Indent toolbar button on the HOME tab. The list item will become indented and the list marker will change. The next
item added to the list will have the same indentation as the previous one and thus
become a part of the nested list.
Increase Indent is not available for the first list item, or for subsequent items in a multiple content block list item.
If the selection is across a multiple content block list item boundary, Both Increase Indent and Decrease Indent will be disabled.
Decreasing indent
If you want to end the nested list and return to the previous indentation level, use
the Decrease Indent feature. Place the cursor in the line that should be a continuation of the previous
list and click the  Decrease Indent toolbar button on the HOME tab. The indentation of the list item will decrease and the list marker will change
back to the marker for a list of a higher level.
Decrease Indent toolbar button on the HOME tab. The indentation of the list item will decrease and the list marker will change
back to the marker for a list of a higher level.
Decrease Indent is not available for subsequent items in a multiple content block list item.
Inserting Hyperlinks
The Link feature lets you add clickable hyperlinks to your documents.
To insert a link in your document, click the  Link toolbar button on the REFERENCES tab or use the Ctrl+L keyboard shortcut. If you want the link to be assigned to a word or phrase, select
it first. If no text is selected, the link URL will appear in the document as-is.
Link toolbar button on the REFERENCES tab or use the Ctrl+L keyboard shortcut. If you want the link to be assigned to a word or phrase, select
it first. If no text is selected, the link URL will appear in the document as-is.
Use the Link dialog box to choose the link type and configuration options pertaining to your choice.
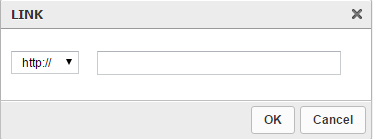
-
Protocol - the communication protocol used with the web address. You can choose between http:// and https://
-
URL - the web address of the resource that the link is pointing to. It may be located on the same server as the web site you are currently on or an external server. If you want to use an external address, you must use the full absolute path (for example http://example.com/about.html).
Edit an existing hyperlink by double clicking on the hyperlink, right-clicking on
the hyperlink and choosing Edit Link from the context menu, or by placing the cursor inside the hyperlink and then clicking
the Link toolbar button on the REFERENCES tab.
Delete the hyperlink by right clicking on the hyperlink and choosing Unlink from the context menu.
Footnotes and endnotes
Inserting a footnote
To insert a footnote in your document, place your cursor in the text where you want
the footnote and click the  Insert Footnote toolbar button on the REFERENCES tab.
The Insert Footnote dialog displays.
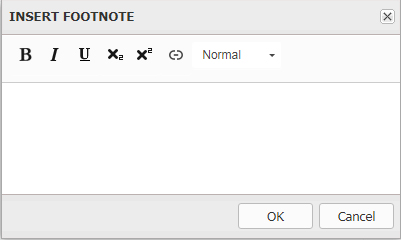
Type in the text of your footnote and click OK. The footnote will be placed at the cursor location. Footnotes are shown at the end of the page in previews.
Inserting an endnote
To insert an endnote in your document, place your cursor in the text where you want
the endnote and click the  Insert Endnote toolbar button on the REFERENCES tab.
The Insert Endnote dialog displays.
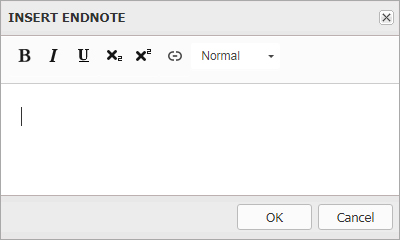
Type in the text of your endnote and click OK. The Endnote is added at the cursor location. The Endnotes are shown at the end of the document in Previews.
Cross references
The Cross Reference feature lets you add cross references to your documents, pointing to any other Section, Figure or Table in the document.
Inserting a cross reference
There are two types of cross references:
-
Synchronized Cross Reference - the link text is derived from the referenced content and will be refreshed automatically from the referenced content if the referenced content is updated.
-
Unsynchronized Cross Reference - the link text is user provided and is not updated based on changes to the referenced content. An unsynchronized reference can be changed into a synchronized one using the Synchronize Cross Reference toolbar command.
To insert a synchronized cross reference in your document:
-
Place the cursor where you want the cross reference and click the
 Insert Cross Reference toolbar button on the REFERENCES tab. The Insert Cross Reference dialog box displays.
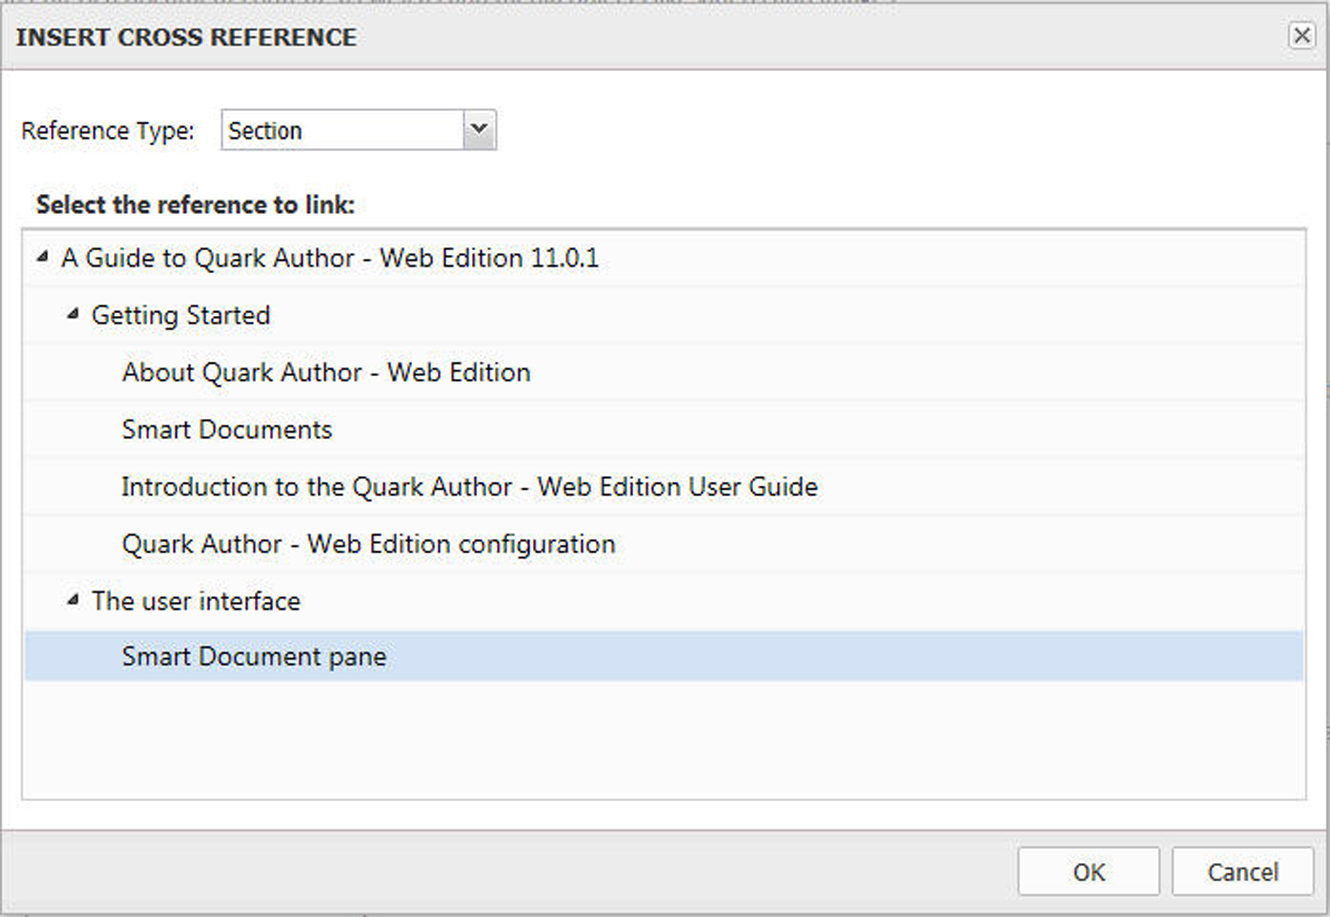
The Insert Cross Reference dialog box -
Choose the type of cross reference you are inserting from the drop-down menu: Section, Table, Figure, Box, Region or Callout.
-
Once you have chosen a cross reference type, the available references to link to will be listed. Choose a reference to link to and click OK. The cross reference will be inserted.
Any changes made at the cross-reference link will be reflected in the cross-reference text.
To insert an unsynchronized cross reference, select text in your document and then insert a cross reference, the cross reference and the link will not be synchronized.
Control+Click on any cross reference to jump to the cross reference link.
Editing a cross reference
To edit an existing cross reference:
-
Double click on the cross reference, right click on the cross reference and choose Edit Cross Reference from the context menu, or place the cursor in the cross reference and then click the
Insert Cross Reference button. The Edit Cross Reference dialog box displays.
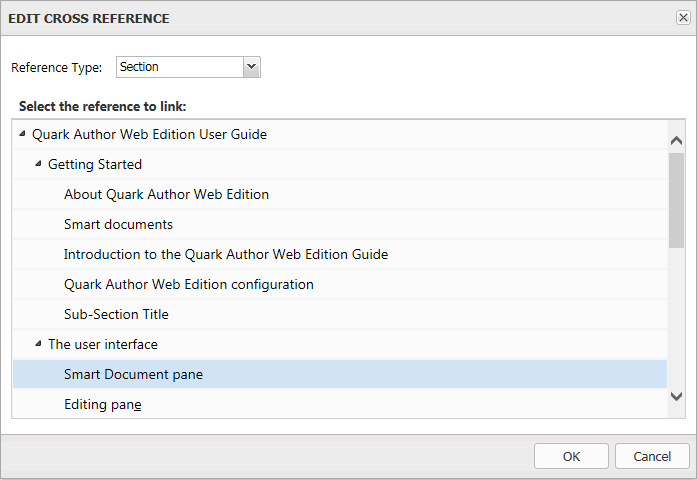
The Edit Cross Reference dialog box -
Choose the type of cross reference you want from the drop-down menu: Section, Table, Figure, Box, Region or Callout.
-
Once you have chosen a cross reference type, the available references to link to will be listed. Choose a reference to link to and click OK. The cross reference will be changed to your new selections.
Synchronize cross references
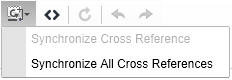
Change an unsynchronized cross reference to a synchronized cross reference using the
 Synchronize Cross Reference toolbar button on the REFERENCES tab.
You can choose to synchronize the selected cross reference or all cross references in the document.
Figures and images
Inserting an image
Images can be inserted from the Platform repository, from a local file system, pasted from the clipboard and by dragging and dropping.
Inserting a Platform image
To insert an image from the Platform repository:
-
Place your cursor in the document where you want to insert the image, click the
 Insert Image toolbar button on the INSERT tab and choose From Platform from the drop-down menu.
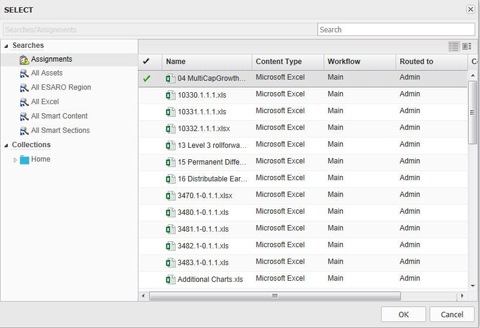
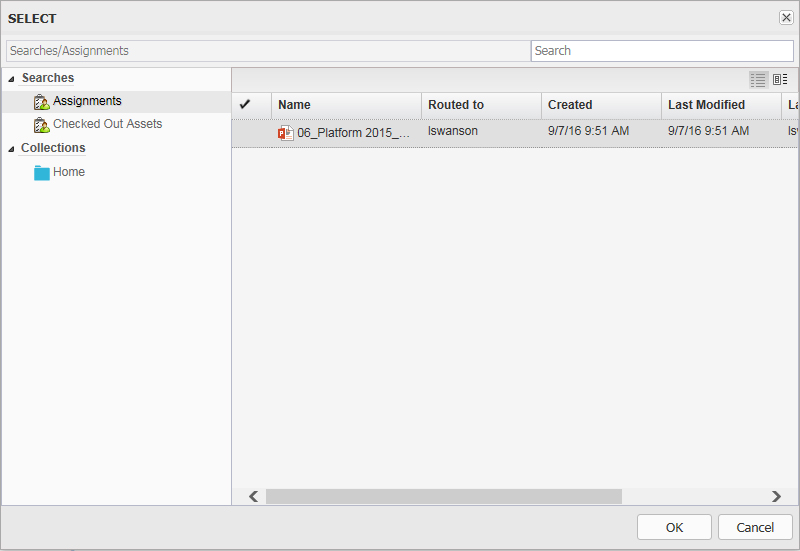
The Select dialog is displayed.
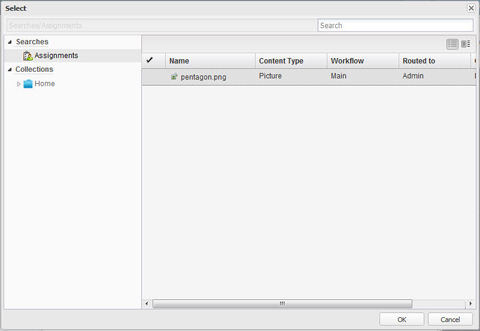
The Select dialog -
Browse to the desired image and select it.
The image will be inserted into the document.
Inserting a local image
To insert an image from a local file system:
-
Place your cursor in the document where you want to insert the image, click the
Insert Image toolbar button on the INSERT tab and choose From Local File System from the drop-down menu.
The Choose File to Upload dialog is displayed.

The Choose File to Upload dialog -
Browse to the desired image and select it.
You can also select the local image you wish to insert and drag and drop it into your document. You can also insert images copied to the clipboard (may be copied from MS Excel, Word, PowerPoint, etc.).
You will be prompted to check in the image:
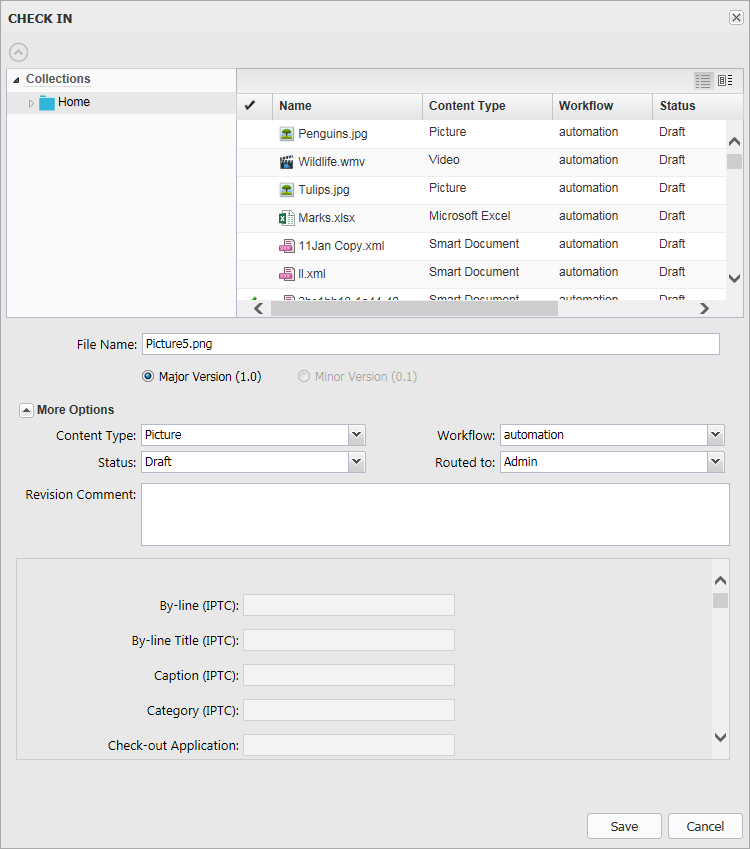
The Check In dialog -
Specify the Platform information for the asset.
-
Click Save.
The image is uploaded and checked in to the Platform repository, and inserted into the document.
Inserting a figure
Figures can be inserted from the Platform repository or from a local file system.
Inserting a Platform figure
To insert a figure from the Platform repository:
-
Place your cursor in the document where you want to insert the figure and click the
 Insert Figure toolbar button on the INSERT tab.
The Insert Figure dialog is displayed.
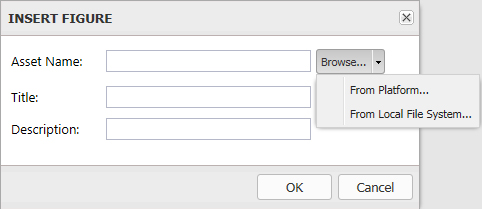
The Insert Figure dialog -
Click the Browse button and choose From Platform from the drop-down menu.
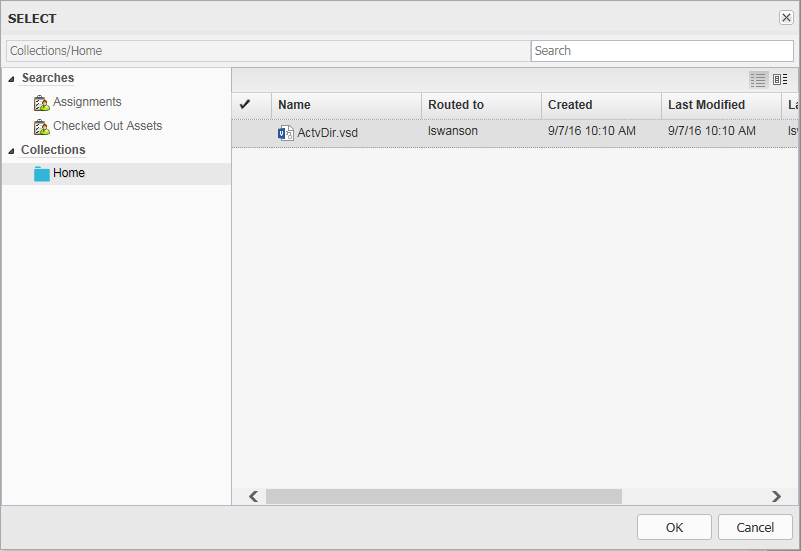
The Select dialog is displayed.
The Select dialog -
Browse to the desired figure and select it.
-
Enter the Title and Description of the desired figure and click OK.
The figure will be inserted into the document.
Inserting a local figure
To insert a figure from a local file system:
-
Place your cursor in the document where you want to insert the figure and click the
Insert Figure toolbar button on the INSERT tab.
The Insert Figure dialog is displayed.
The Insert Figure dialog -
Click the Browse button and choose From Local File System from the drop-down menu.
The Choose File to Upload dialog is displayed.
The Choose File to Upload dialog -
Browse to the desired figure and select it.
-
Enter the Title and Description of the desired figure and click OK.
You will be prompted to check in the image:
The Check In dialog -
Specify the Platform information for the asset.
-
Click Save.
The figure will be uploaded and checked in to the Platform repository, and inserted into the document.
Resizing figures and images
After you have placed a figure or an image in the document, you can resize it by clicking on the bounding box and dragging it to the desired size.
Replacing a figure or an image
After you have placed a figure or an image in the document, double clicking on it displays the Select dialog, allowing you to select another figure or image to replace it.
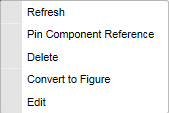
Converting an image to a figure
After you have placed an image in the document, convert it to a figure by right-clicking on it and selecting Convert to Figure from the context menu.
Inserting special characters
To insert a special character into your document, place your cursor in the document
where you want to insert the special character and click the  Insert Special Character toolbar button on the INSERT tab.
The Select Special Character dialog window displays and allows you to choose a symbol from a set containing Latin letters, numbers (including fractions), currency symbols, punctuation, arrows, and mathematical operators.
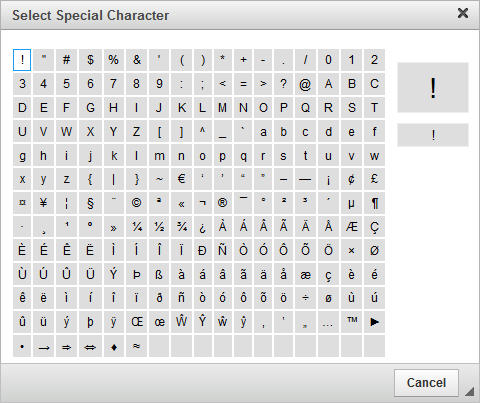
Select the character you need. The dialog window will close automatically and the special character will appear where the cursor is positioned in the text.
Tables
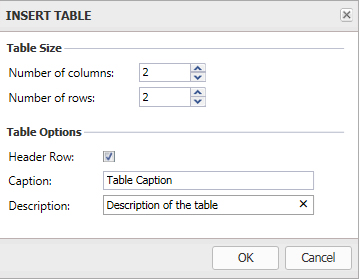
Inserting tables
To insert a table, click the  Insert Table toolbar button on the INSERT tab. The Insert Table dialog displays:
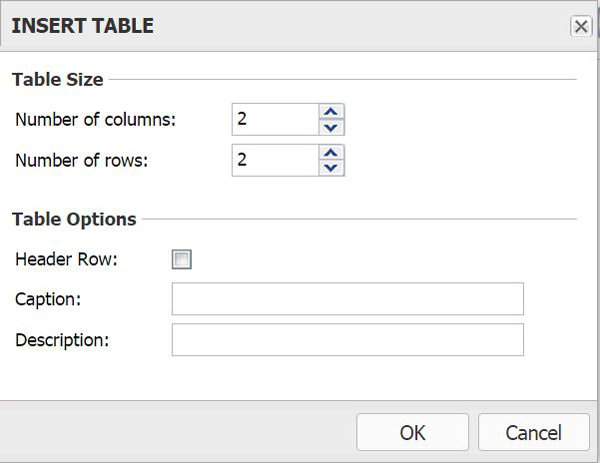
Specify the table criteria:
-
Number of columns - the number of columns in the table (mandatory).
-
Number of rows - the number of rows in the table (mandatory).
-
Header Row - check this box if you want your table to have headers.
-
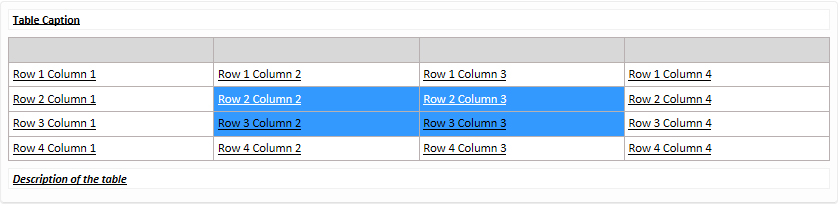
Caption - the label of the table that is displayed on top of it.
-
Description - a description of your table.
Inserting tables from server
To insert a smart table, click the  Insert Table from Server toolbar button on the INSERT tab. The Select dialog displays:
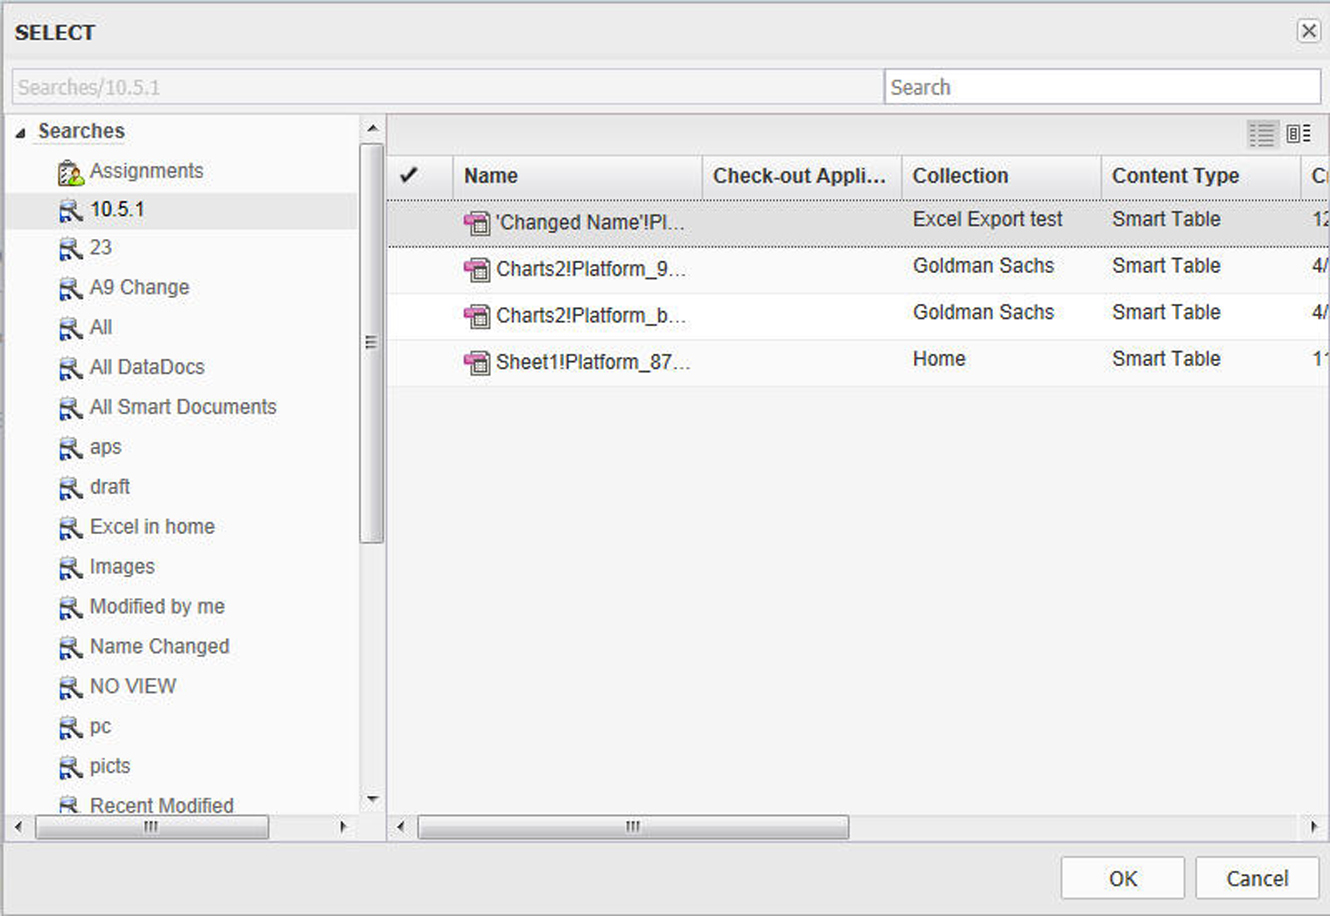
Browse to the desired table and select it.
Editing tables
To edit the table, right-click on any cell inside the table to open the table context menu, or place your cursor on any cell inside the table and select the dynamic TABLE tab. Options will be enabled/disabled based on the current selection.

To insert a new paragraph after the table, use the Insert Paragraph After  option. A new paragraph will be inserted directly after the table.
Inserting rows and columns
To insert additional rows and columns, right-click on the desired table, row or column and use the Insert option.
Hover your mouse over the Insert menu option to display further options.
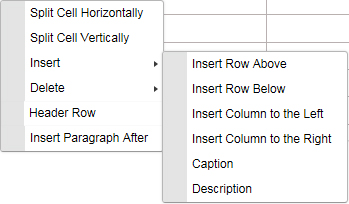
Insert context menu option elements:
-
Insert Row Above - inserts a new row before the selected row.
-
Insert Row Below - inserts a new row after the selected row.
-
Insert Column to the Left - inserts a new column to the left of the selected column.
-
Insert Column to the Right - inserts a new column to the right of the selected column.
-
Caption - allows you to add a caption to the table.
-
Description - allows you to add a description to the table.
Deleting rows and columns
To delete an entire table and its contents, or individual rows or columns, right-click on the desired table, row or column, and use the Delete option.
Hover your mouse over the Delete menu option to display further options.
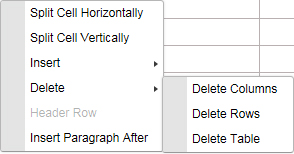
Delete context menu option elements:
-
Delete Columns - deletes the selected column.
-
Delete Rows - deletes the selected row.
-
Delete Table - Deletes the entire table and its contents.
Splitting cells
To split a single cell into two cells:
-
Place the cursor in the desired cell.
-
Right-click and choose Split Cell Horizontally or Split Cell Vertically.
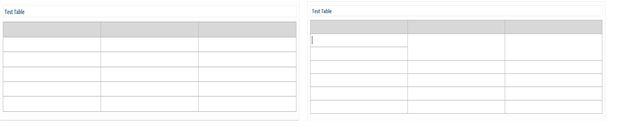
An example of splitting a table cell horizontally.
Merging cells
To merge cells together, select the cells to be merged, right-click and choose the Merge Cells option.
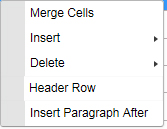
Adding captions and header rows
When you create a table, you can choose to add a header row, caption, and description to the table.
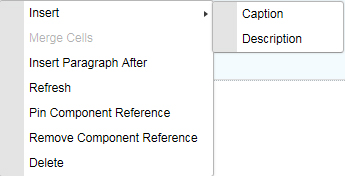
To insert a caption or description to an existing table:
-
Right-click on the desired table.
-
Hover your mouse over the Insert menu option to display further options.
-
Choose Caption or Description from the menu.
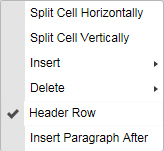
To convert the first row of an existing table to a header:
-
Right-click on the first row of the table.
-
Choose Header Row from the menu.
Copy and pasting table cells
You can copy selected cells from a table and paste the content into a different cell of the same table, or you can use them to create a new table.
To create a new table from selected cells of a table:
-
Select the table cells to copy and click Ctrl-c to copy them.
-
Place the cursor where you want the new table, and click Ctrl-V.

A new table is created comprised of the selected and copied cells.
Inserting videos
To insert a video:
-
Click the
 Insert Video toolbar button on the INSERT tab. The Insert Video dialog displays:
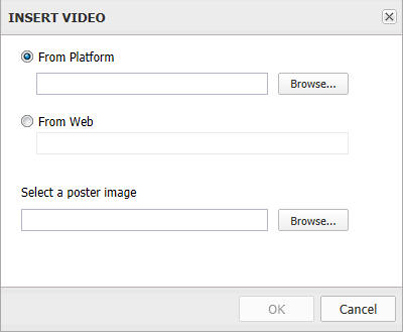
The Insert Video dialog box -
Choose From Platform or From Web.
-
Select Browse to browse to the location of the desired video.
-
Under Select a poster image, choose Browse to select an image to use for the video.
-
Click OK to insert the chosen video.
Inserting Microsoft Excel components
The Web Editor allows you to insert Excel Tables and Charts into your document. To
insert Excel content, click the  Insert Excel Components toolbar button on the INSERT tab and choose Insert Table or Insert Chart from the drop-down menu.
The Select dialog box opens.
Browse to the desired Excel content and select it.
Editing Microsoft Excel components
Once inserted into the document, you can add captions/titles and descriptions to Excel components using the context menu. Right-click the table or chart:
Inserting PowerPoint slides
The Web Editor allows you to insert one or more PowerPoint slides into your document. Slides are inserted as image components in the document.
To insert a PowerPoint slide from the Platform repository:
-
Click the
 Insert PowerPoint toolbar button on the INSERT tab. The Select dialog displays:
The Select dialog box -
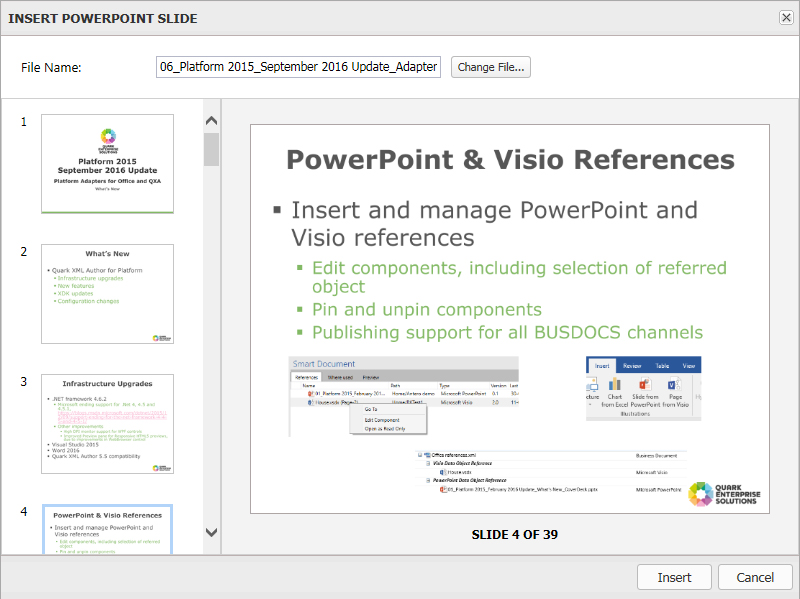
Browse to the desired PowerPoint presentation, select it and click OK. The INSERT POWERPOINT SLIDE dialog displays:
-
Select the desired slide and click Insert. The slide will be inserted into the document.
Use the Change File button to select a different PowerPoint presentation.
Inserting Visio pages
The Web Editor allows you to insert one or more Visio pages into your document. Pages are inserted as image components in the document.
To insert a Visio page from the Platform repository:
-
Click the
 Insert Visio toolbar button on the INSERT tab. The Select dialog displays:
The Select dialog box -
Browse to the desired Visio file, select it and click OK. The INSERT VISIO DRAWING dialog displays:
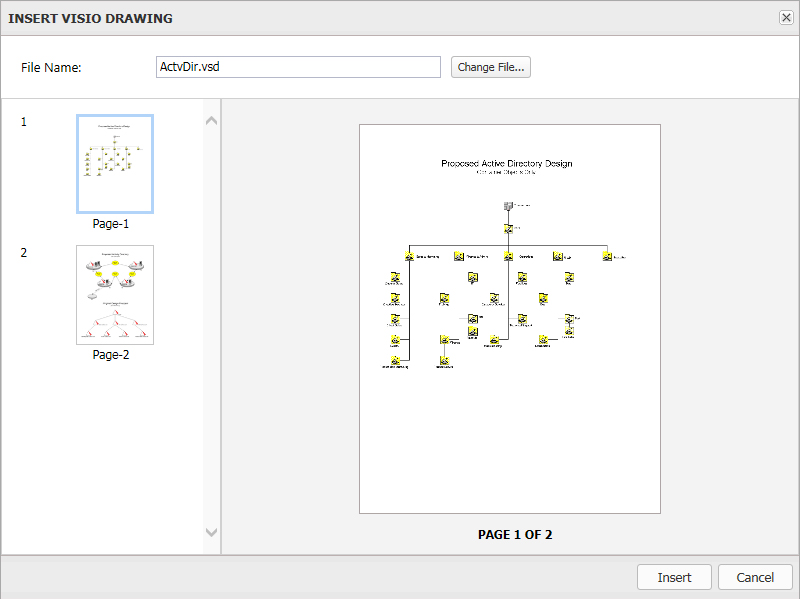
-
Select the desired page and click Insert. The page will be inserted into the document.
Equation editing
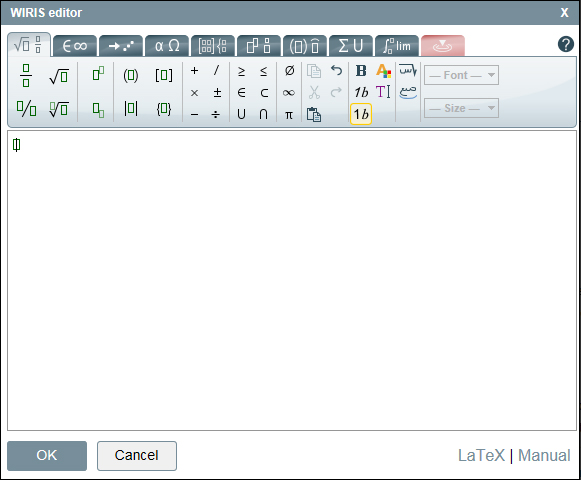
Quark Author Web Edition has integrated with the Wiris Equation Editor to allow you to insert and edit math equations in your document.
To launch the WIRIS editor:
-
To insert a new equation, click the Math Editor (
 ) toolbar button on the INSERT tab.
-
To modify an existing equation, double-click the equation or select it and click the Math Editor (
) toolbar button on the INSERT tab.
You can only edit equations in the WIRIS editor, you cannot edit them on the Quark Author Web Edition canvas. How the equation is rendered on the canvas is also controlled by the WIRIS editor. You cannot apply any formatting to the equation manually.
Equation editing is not available in WebSphere and WebLogic.
Indexes
An index lists the keywords, terms and topics in a document, along with the pages that they appear on, allowing a reader to find them within your document instantly and easily.
Quark Author Web Edition allows you to define index items. The index generated from these terms can be seen in the PDF preview.
You can create an index term:
-
for an individual word or phrase.
-
for an individual table, image, figure or component.
-
for a section or sub-section that spans a range of pages.
-
that refers to another index term, such as "Transportation. See Bicycles".
Managing index terms
The upper section of the Index tab lists the index terms in the document as well as the number of occurrences for each index term.
Creating index terms
Use the Index tab on the Right pane to create index terms.
To add an index term to your document:
-
In the document, select what you want to be the index term.
-
If you place the cursor in any part of a section or sub-section title and add it as an index term, the entire section or sub-section will be marked as an occurrence.
-
If you place the cursor within a section or sub-section, the entire paragraph will be marked as an occurrence.
-
If you want the index term to be an individual word or phrase, select the word or phrase. If the phrase is four words or fewer, the Phrase tag type will be applied to the word or phrase and just that word or phrase will be marked as an occurrence. If the phrase is longer than four words, the entire paragraph containing the words will be marked as the occurrence.
You can also manually tag the word or phrase using the Tag Types drop-down menu before adding it as an index. This allows you to have a phrase longer than four words.
-
-
Click the
 Add Term toolbar button.
-
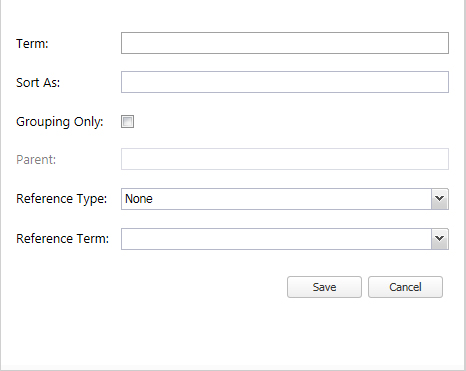
The Term field will automatically be filled with the word or phrase you selected in the document. You can overwrite this with your own text.
-
The index terms will automatically be placed in alphabetical order (according to the first letter of the index term) in the finished document. If you want the index term to appear at a different place, enter that in the Sort As field. For instance, if you want the index term
User Interfaceto appear underIinstead ofU, enterIin this field. -
Check Grouping Only, if you want to use this term just for grouping other index terms. Grouping Only terms will not have any occurrences associated with them.
-
If you are adding a child element, the Parent field will contain the index term of the parent element.
-
In Reference Type, choose a reference type from the drop-down menu. To create a reference that refers to another entry, choose See or See also. This field can be used if you want to cross reference other index terms with the current index term.
-
When creating a reference that refers to another, choose the term you want to refer to from the list of existing terms in the Reference Term drop-down menu. Use this field to select index terms you want to be cross referenced with the current term. You can select one or more index terms from the drop-down list.
-
-
Click Save. The index term is added and appears in the list of index terms. One occurrence of the index term is listed in the Occurrences section of the Index tab.
Adding a child term
This option can be used to add a new index term as a child to an existing index term.
To add a child term to an existing index term:
-
Select an existing index term from the list of terms on the Index tab.
-
Select the word or phrase in the document that you want to add as a child term to the selected index term.
-
Click the
 Add Child Term toolbar button.
The Term field will automatically be filled with the word or phrase you selected in the document. You can overwrite this with your own text. Fill out the other fields as described in "Creating index terms".
-
Click Save. The index term is added as a child term and appears in the list of index terms. One occurrence of the index term is listed in the Occurrences section of the Index tab.
Editing an index term
To edit an existing index term:
-
Select an existing index term from the list of terms on the Index tab.
-
Click the
 Edit Term toolbar button or double-click on an index term.
-
Make desired changes and click Save.
Deleting an index term
To delete an existing index term:
-
Select an existing index term from the list of terms on the Index tab.
-
Click the
 Delete Term toolbar button.
-
The term and all of its occurrences will be deleted.
Deleting a parent term will also delete all of its child terms.
Managing occurrences of index terms
The lower section of the Index tab lists all the marked occurrences of the index terms in the document.
When a new index term is added, it will have one occurrence by default. You can add multiple occurrences to the same index term if needed.
Adding occurrences
To add an occurrence to an existing index term in your document:
-
Select an existing index term from the list of terms on the Index tab.
-
Select the section, word or phrase in the document that you want to be marked as an occurrence of the selected index term.
-
If you place the cursor in any part of a section or sub-section title and add it as an index term, the entire section or sub-section will be marked as an occurrence.
-
If you place the cursor within a section or sub-section, the entire paragraph will be marked as an occurrence.
-
If you want the occurrence to be an individual word or phrase, select the word or phrase. If the phrase is four words or less, the Phrase tag type will be applied to the word or phrase and just that word or phrase will be marked as an occurrence. If the phrase is longer than four words, the entire paragraph containing the words will be marked as the occurrence.
You can also manually tag the word or phrase using the Tag Types drop-down menu before adding it as an index. This allows you to have a phrase longer than four words.
-
-
Click the
 Add Occurrence toolbar button.
-
The occurrence will be added.
Deleting an occurrence
To delete an existing marked occurrence of an index term:
-
Select an existing index term from the list of terms on the Index tab.
-
Select the marked occurrence of the index term that you want to delete.
-
Click the
Delete Occurrence toolbar button.
-
The marked occurrence of the selected index term will be deleted.
Deleting all occurrences of an index term will delete the index term as well.
Managing the scope
You can increase or decrease the scope of the occurrence. For instance, if you marked an entire section in the document as an occurrence of an index term, and only want to point to a single paragraph instead, you would want to decrease the scope of the occurrence.
To increase or decrease the scope of an existing marked occurrence of an index term:
-
Select an existing index term from the list of terms on the Index tab.
-
Select the marked occurrence of the index term that you want to edit.
-
You can increase or decrease the scope of the occurrence:
-
To increase the scope, click the
 Increase Scope toolbar button.
-
To decrease the scope, click the
 Decrease Scope toolbar button.
-
Spelling and grammar check
Use the  Spelling and Grammar drop-down menu on the REVIEW tab to enable and disable the spelling and grammar check and to set the proofing
language for the spelling and grammar check.
Spelling and Grammar drop-down menu on the REVIEW tab to enable and disable the spelling and grammar check and to set the proofing
language for the spelling and grammar check.
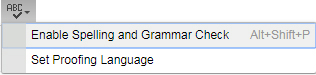
Enabling spelling and grammar check
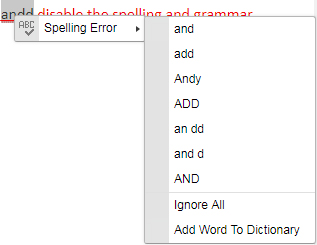
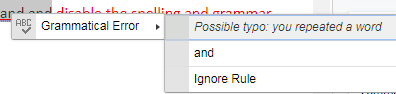
When the spelling and grammar check is enabled, misspelled words and grammatical errors will be underlined in the text. Spelling errors appear in red and grammatical errors appear in blue.
Right click on the underlined word/section to reveal and correct the error:
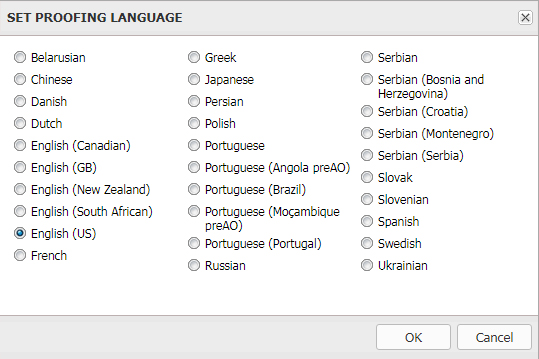
Setting the proofing language
Choose Set Proofing Language from the drop-down menu and select from over thirty default languages.
Content components
Tables and Regions can be saved as reusable components.
Create a component
To create a component:
-
In the Editing pane, right-click on the table or region you want to make into a reusable component.
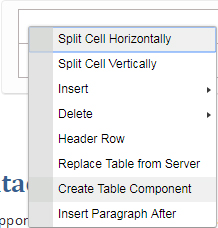
-
Choose Create Table Component or Create Region Component from the context menu. The CHECK IN dialog box displays.

-
Specify a file name and location for the component.
-
Fill out the remaining fields with the appropriate data and click Save.
The content will be saved as a separate .xml file in the specified location. You now have a reusable component that can be included in other smart documents by using the Insert Table from Server or Insert Region from Server options on the INSERT tab.
Insert a component
To insert a previously saved table or region component into your smart document:
-
If the component will be new content:
-
Place your cursor in the document where you want to insert the component, click the
 Insert Table from Server or the
  Insert Region from Server button on the INSERT tab. The Select dialog box displays.
-
Search or Navigate to locate the component.
-
Select the component and click OK.
-
-
If the component will replace existing content:
-
Right-click the table or region to replace and choose Replace Table from Server or Replace Region from Server. The Insert dialog box displays.
-
Search or Navigate to locate the component.
-
Select the component and click OK.
-
Edit a component
To edit source content in a component, the component must be open for editing. The following two icons indicate the editing status for a table or region component:
-
 - This indicates the component is checked out and available to edit.
-
 - This indicates the item is locked and not available for editing.
If the component is not open for editing, right-click on the component and choose Edit Component from the context menu. You will now be allowed to edit the content.
When you have finished editing, right-click on the component and choose:
-
Save Component to save your changes and leave the component open for editing.
-
Save and Close Component to save the changes and lock the component from editing.
-
Discard Changes to discard any changes and return the component to its last saved state.